DIY $5 Tin Can Smoker

When a friend’s Facebook memory showed his home made smoker, I was obsessed and wanted to have my own fun. Thanks JLH! After a bit of planning, I now have my own DIY Tin Can Smoker and manufactured for less than $5!
Objectives and considerations:
- Hand made by me
- I’d build my own design – hours and hours of internet searches did not provide a pattern or design, so figuring out air flow and temperature control was up to my “wanna-be” engineering brain
- I planned to cook a whole animal in the DIY smoker <Squirrel anyone? Just kidding!>
- I lack serious construction skills <I prefer hand tools over power tools….and I actually don’t mind IKEA builds if there are full instructions available, yes, I’m a typical girl.>
- I have a short attention span – the build time had to be complete in a weekend, even better, if it was complete in a day
- Oh and 10 fully working fingers when the build is complete would be nice.
I nailed it <well, technically I screwed it all together haha>! I met every goal.
If you’re wondering how I spent $5 dollars Canadian on this smoker, I consciously decided to recycle or upcycle the smoker cans by sourcing the large tin cans from my local Italian restaurant, thanks to Sauce Italian Kitchen and Market in Calgary (the pasta is always al dente and delish. Check it out!). Further, I sourced screws and hardware from the abundance of random hardware stored in every The remaining five dollar budget was spent on a trivet or Chinese dim sum stand for $1.89, a can of Chef Boyardee for $1.89 and $0.89 for the tomato paste. There’s always an abundance of random screws and other hardware in the house.
To find out how my whole animal cook turned out on the DIY Tin Can Smoker, click here.
DIY Tin Can Smoker
Ingredients
Equipment
Method
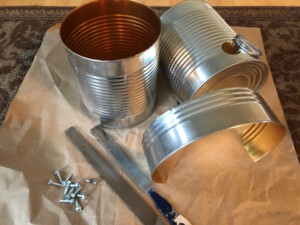
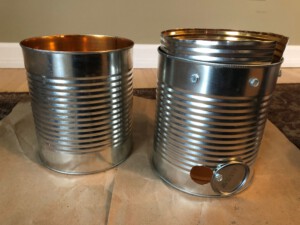
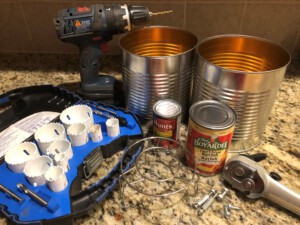
- Even for construction projects, I recommend mise en place – gather everything you need together. Tip 1: My local Italian restaurant supplied the large smoker cans for this project. Formerly storing delicious tomato sauce, these aluminum cans would have otherwise been recycled.Tip 2: Cantonese/ chinese grocery stores stock trivets used for steaming dim sum. A 5" trivet fit perfectly inside my DIY Tin Can Smoker.

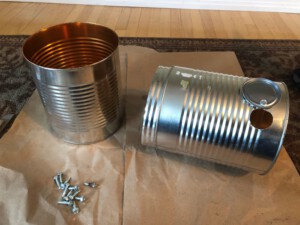
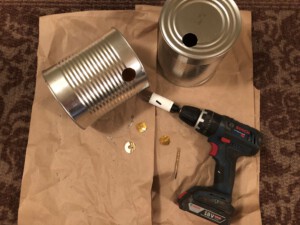
- The smoker will be constructed from 2 tin cans on top of each other; the upper smoker can and lower smoker can. Using the metal hole saw, cut out a 1" hole about 1/2" above the bottom of the lower smoker can. On the opposite side of the original hole, cut out an additional 1" hole. These holes create the air intake to the smoker can.
- On the upper smoker can, turn it upside down so that the opening is to the floor and the flat surface of the can is facing you. Off center, cut a 1" hole with the metal hole saw to create your smoker exhaust. (The Chef Boyardee or soup can lid will be your exhaust valve, so the exhaust hole needs to be out of the way to enable exhaust control.)
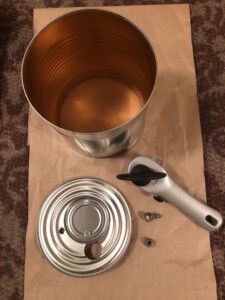
- Use the can opener to remove the top can lid from the small tomato paste can. Remove the contents and use the can opener to remove the bottom can lid. Wash the lids. Using your hands, gently fold both lids so they approximately round the smoker tin cans. These tomato paste lids will be the valves to the air intake on the lower smoker can.
- On the soup or Chef Boyardee can, use the can opener to remove the top can lid. Wash lid. This soup can lid will be the valve to the exhaust on the upper smoker can lid.
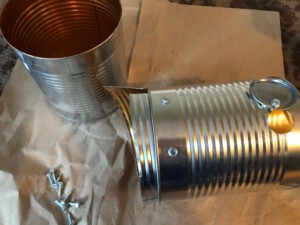
- Using the self tapping screws (I predrilled holes before screwing the self tapping screws in) and mount the air intake valves on the side of the air intake hole. (Remember, if you set the screw above the hole, the valve will naturally want to stay closed. By setting the screw to the side of the hole, you should have better control on your air intake.)
- Using the self tapping screws (I predrilled holes before screwing the self tapping screws in), mount the exhaust valve next to the exhaust hole on the upper smoker can lid.
- On the upper smoker can lid, drill a hole for the smoker lid handle (a screw and nut). Be sure to drill and mount the smoker lid handle in a spot that will not interfere with the exhaust valve opening fully .
- Use the can opener to remove the lid of the upper smoker can (which has the exhaust hole and exhaust valve and lid handle drilled. Your lid is now detached.
- Use a metal file to remove sharp edges on the air intake and exhaust holes.

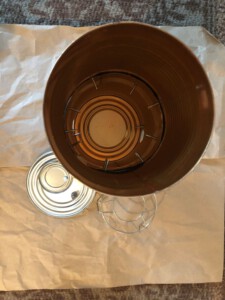
- On the third large tin can, use the tin snips to cut a 4+" width around the bottom of the can to create what will be the inner connector ring. Remove about 1" inch from the circumference of the inner connector ring so that it can tuck inside the upper and lower smoker cans together and seal them to prevent air seepage between the smoker cans.
- Set the inner connector ring with the finished can edge inside the lower smoker can. The inner connector ring will be held by tension.
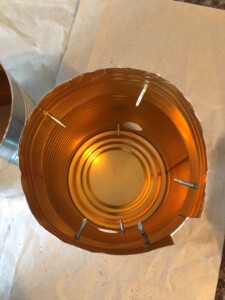
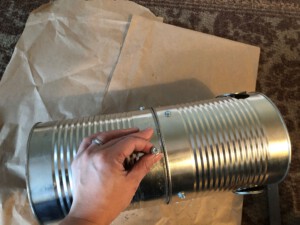
- On the lower smoker can, using the metal drill and a self tapping screw, add a screw to connect the inner connector ring.
- Using the metal drill and a self tapping screw, add another screw about 4 inches from the first screw into the lower smoker can and inner connector ring
- Add 3 more screws along the top rim of the lower smoker can to connect the inner connector ring. An overhead view should see 5 screws drilled inwards into the lower smoker can.
- Set the upper smoker can (which has no top or bottom, essentially a tube) on top of the lower smoker can with the inner connector ring on the inside. Remember to keep the "cut edge" with the lid upwards, so that the lid will lay flat when it is in use.
- On the upper smoker can, along the bottom, use the metal drill and a self tapping screw to add a screw to connect the upper smoker can to the inner connector ring.
- Set in 4 additional tapping screws around the lower portion of the upper smoker can to finish connecting the upper and lower smoker can.
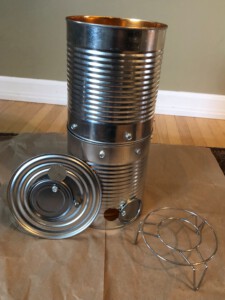
- Voila! By setting the trivet on top of the screws inside the inner connector ring, you now have a rack for your DIY Tin Can Smoker!
- Be sure to season the smoker by burning charcoal in the DIY Tin Can Smoker before cooking on the smoker, as the tin cans may have a residue or coating that needs to be burned off. Now go cook something!